Install and Pair the Windows Local Signer
Install Prospect Signer on Windows, pair it with your browser, and sign eFaktura documents with a USB token whose PIN never leaves your computer.
Prospect Signer is a small Windows program that signs eFaktura requests with the certificate on your USB token. It runs on the computer of the person who is authorized to sign, next to the clock, and answers only to the browser you paired with it. The private key stays on the token and the PIN stays in the signer; neither is sent to Prospect.
Before you start
- Role: each person who signs sets up their own certificate, and needs access to the eFaktura workspace. At UJP, the company's e-UJP administrator must have given that person eFaktura rights.
- e-UJP ID: your own identifier at UJP. Sign in to UJP's eFaktura site and open your profile; it is the number under ЕУЈП ИД in the Кориснички податоци card. Prospect links to the site where it asks for the ID.
- Computer: Windows, with the driver software of your certificate issuer already installed so that Windows recognizes the token.
- Token: the USB token with the qualified certificate registered for your company at UJP, and its PIN.
- Browser: the browser in which you use Prospect, on the same computer as the token. Pairing is per browser, so repeat it if you switch browser or computer.
Download and install
Open Settings → eFaktura and expand Signing. Under Signing on this computer the first step reads Install Prospect Signer. If you cannot open Settings, choose Set up signing in the eFaktura workspace instead.
Choose Download for Windows and run the downloaded installer. It installs for your Windows user only and does not ask for an administrator password.
When the installation finishes, the signer window opens by itself. Go back to Prospect; it notices the signer within a few seconds and moves to the next step. Check again looks at once.
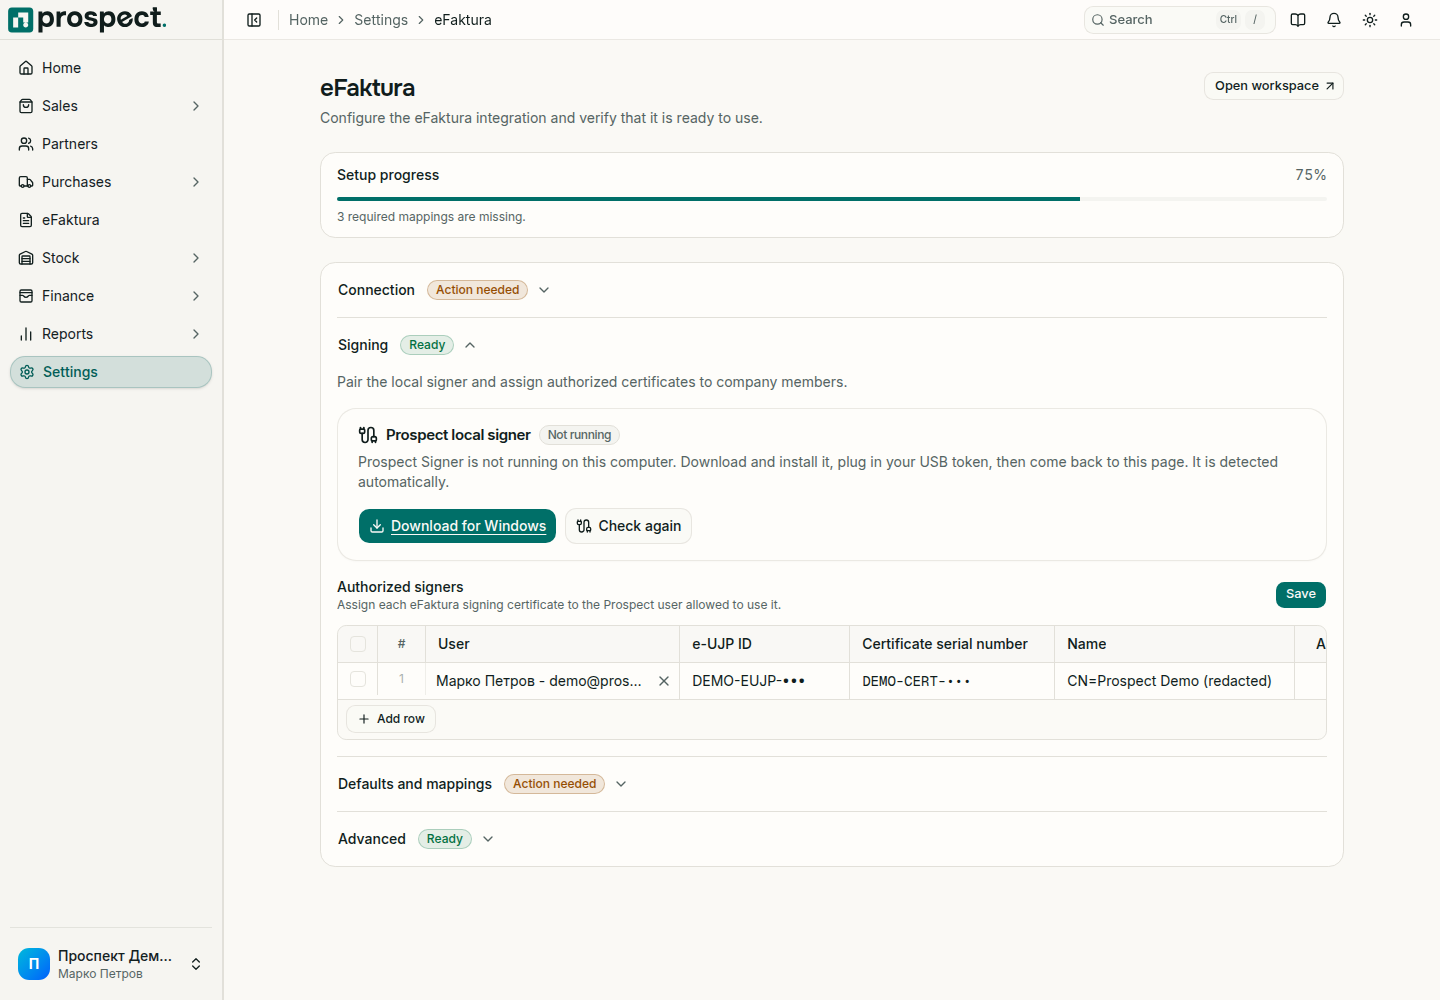
Install the signer only from this download. Prospect also tells you here when a newer version is available and offers Download update; installing it keeps your pairing.
Read the signer window
The window says in plain words whether you can sign and, if not, what is missing. It has three checks:
| Check | Ready when |
|---|---|
| The signer is running | The program started correctly. |
| USB token | A token is plugged in and its certificate was read. The line shows the certificate holder and the date until which the certificate is valid. |
| Prospect is connected | At least one browser is paired with this signer. |
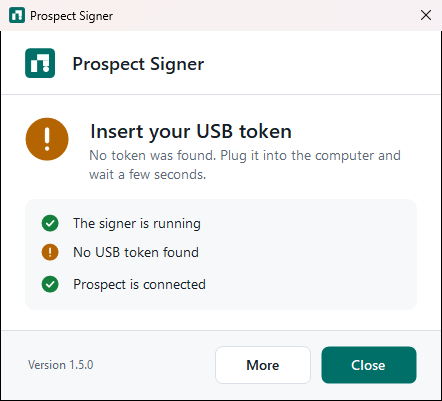
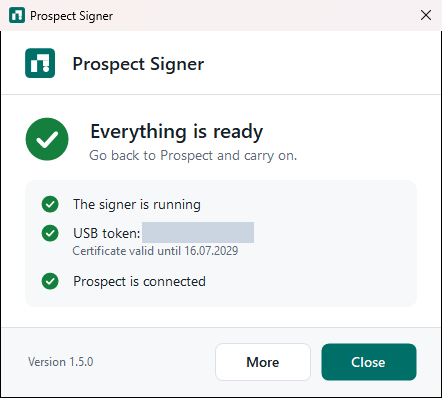
Close hides the window; the signer keeps running. Its icon stays in the notification area next to the Windows clock. If you do not see it, select the small arrow there to show hidden icons. Select the icon to open the window again.
Allow your browser
The signer only answers a browser you have allowed, at your own Prospect address.
As soon as Prospect finds the signer, the signer opens a Connect to Prospect window on the same computer. You do not have to press anything in Prospect first.
Check that the address shown is your own Prospect address, then choose Allow.
The step in Prospect changes to This browser is allowed. If you closed the window without allowing, choose Ask again.
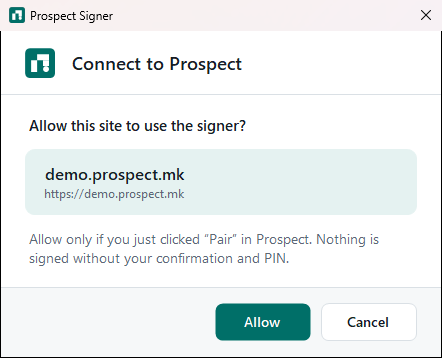
Unexpected pairing request
If this window appears when you are not setting up signing, or it shows an address you do not recognize, choose Cancel. Nothing is paired and nothing is signed.
The pairing is stored in that browser only. Unpair in Prospect removes it from the browser. Clearing the browser's site data removes it too, and you pair again.
Confirm your certificate
Prospect reads the certificate from your token, so you do not type its serial number.
Plug in your USB token. Within a few seconds the step Confirm your certificate shows whose certificate it found and until when it is valid.
Type Your e-UJP ID. The link beside the field opens UJP's eFaktura site: sign in, open your profile, and copy the number under ЕУЈП ИД.
Choose Use this certificate and type the token PIN in the signer window when it asks. Prospect sends UJP one signed, read-only request to confirm that UJP accepts you for the company.
If UJP does not accept the certificate, Prospect says so and shows UJP's reason. Ask your company's e-UJP administrator to give you eFaktura rights, and check that the certificate is registered at UJP; then choose Check with UJP.
Each person has one certificate in Prospect. Use a different certificate replaces it, for example after a renewal. An administrator sees and corrects the whole list under Everyone who signs for the company, and removes a person who changes role or loses the authority to sign.
Sign documents
Plug in the token and make sure the signer shows Everything is ready.
On the invoice, or on its row in the eFaktura workspace, choose Sign and send. Prospect names the invoice, the customer and the amount; confirm it.
When the signer window asks for it, type the token PIN there. Prospect and the browser never receive the PIN.
Wait for the result in Prospect. If you cannot sign on this computer, Prospect says what is missing and offers Set up signing.
After a correct PIN the signer remembers it in memory so that you are not asked for every document. It forgets the PIN when you lock or sign out of Windows, when the computer sleeps, when you remove the token, or when you choose Forget the PIN from the signer menu. Remove the token when you leave the computer.
Wrong PIN
A token locks itself after several wrong PIN attempts. If Prospect reports that the PIN is blocked, only the certificate issuer can unblock it.
The signer menu
Choose More in the signer window, or right-click its icon next to the clock.
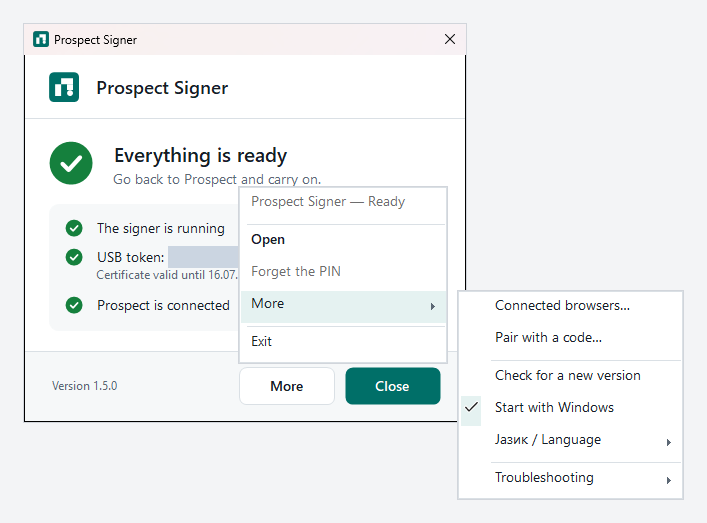
| Menu item | What it does |
|---|---|
| Open | Shows the signer window. |
| Forget the PIN | Clears the remembered PIN. The next signature asks for it again. |
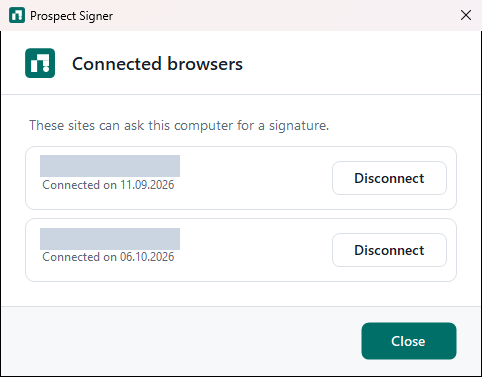
| More → Connected browsers… | Lists the addresses paired with this signer and when each was connected. Disconnect removes one. |
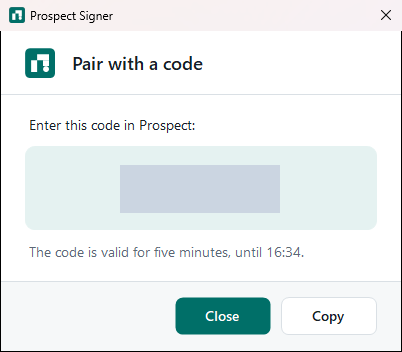
| More → Pair with a code… | Shows a code that is valid for five minutes. Use it only when the Signing section in Prospect shows a Pairing code field. |
| More → Check for a new version | Looks for an update now. |
| More → Start with Windows | Starts the signer when you sign in to Windows. It is on by default. |
| More → Language | Switches the signer between Macedonian and English. |
| More → Troubleshooting | Test the USB token…, Restart the signer, Choose a driver for another token…, and Technical check. |
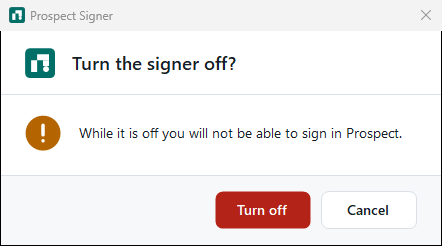
| Exit | Turns the signer off after you confirm. |
If something does not work
| Message in Prospect | What to do |
|---|---|
| Prospect Signer is not running on this computer | Start it from the Windows Start menu, or install it from Settings → eFaktura → Signing. |
| This browser is not allowed to use Prospect Signer yet | Choose Set up signing, then Allow in the signer window. If no window opens, choose Ask again. |
| Prospect Signer stopped responding | Open the signer and choose More → Troubleshooting → Restart the signer, then try again. |
| The USB token was not found | Plug the token in, wait a few seconds, and try again. If it is still missing, use More → Troubleshooting → Test the USB token…. |
| The PIN is not correct | Check the PIN and try again. Stop before the token locks. |
| The USB token PIN is blocked or has expired | Contact the certificate issuer. |
| Cancelled in the Prospect Signer window | Nothing was signed. Start the action again when you are ready. |
If Prospect still cannot reach the signer, check that you are on the computer where it is installed, that you use the paired browser, and that security software on the computer does not block the signer.
Never send a PIN, a pairing code, a certificate file, or a screenshot that shows them to Prospect support or to anyone else.
Next: Mappings and diagnostics and Send outbound eFaktura.